How to Install Handles and Knobs on Shaker Drawer Fronts
- Home
- Blogs
- How to Install Handles and Knobs on Shaker Drawer Fronts
How to Install Handles and Knobs on Shaker Drawer Fronts
- John Miler
Installing handles and knobs on Shaker drawer fronts can seem challenging due to the unique design of these cabinets. However, with the right tools and techniques, you can achieve a professional, symmetrical look. At US Kitchen Cabinet, we recommend using the Cabinet Hardware Jig ORIGINAL (TP-CHJ) for precise placement, ensuring that your hardware is aligned and properly positioned.
Understanding Shaker Drawer Fronts
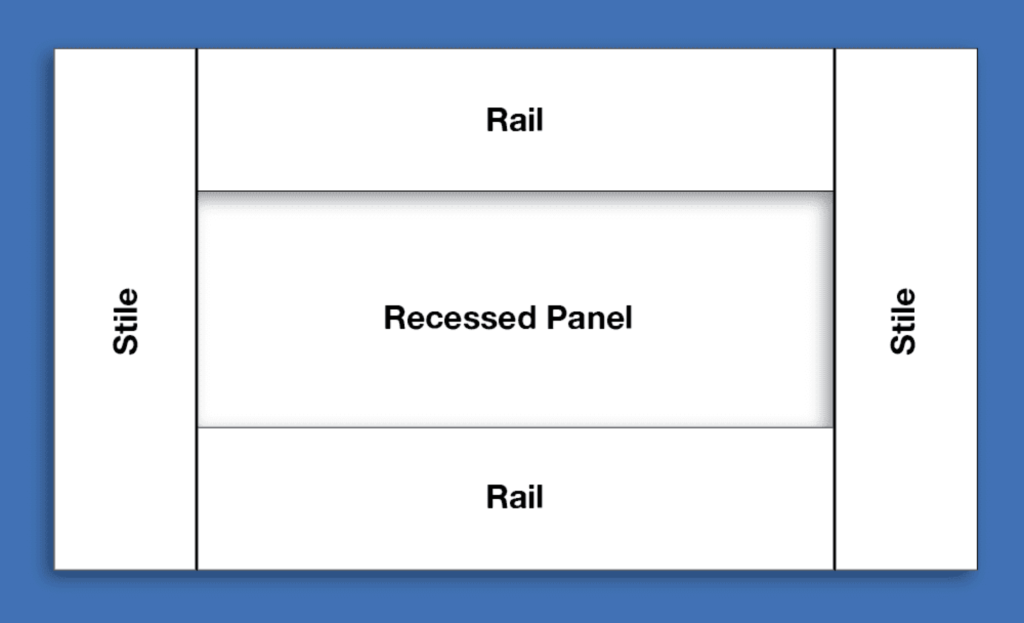
Shaker cabinets are composed of five main parts: the recessed center panel, vertical stiles on both sides, and horizontal rails at the top and bottom. This design creates a clean, classic look, but the recessed panel can make it difficult to accurately mark and drill for hardware placement without the right tools.
Hardware Placement Options
Before drilling, consider your options for hardware placement:
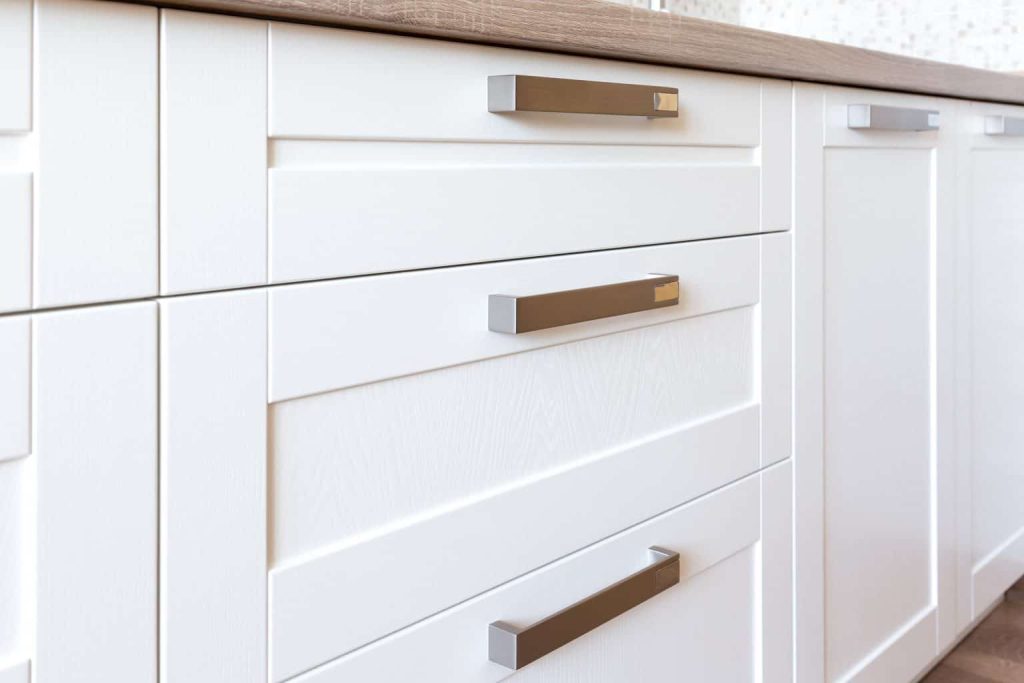
- Centered on the Inset Panel: This is the most common placement for Shaker cabinets. It creates a balanced, symmetrical appearance.
- Centered on the Top Rail: Another popular option, especially for drawers where the recessed panel might be too small for centering the hardware.
Pro Tip: For kitchens with a mix of Shaker and slab drawers, maintain symmetry by placing knobs or pulls on the top ¼ of slab drawers and on the top rail of Shaker cabinets.
Steps for Installing Knobs and Pull Handles
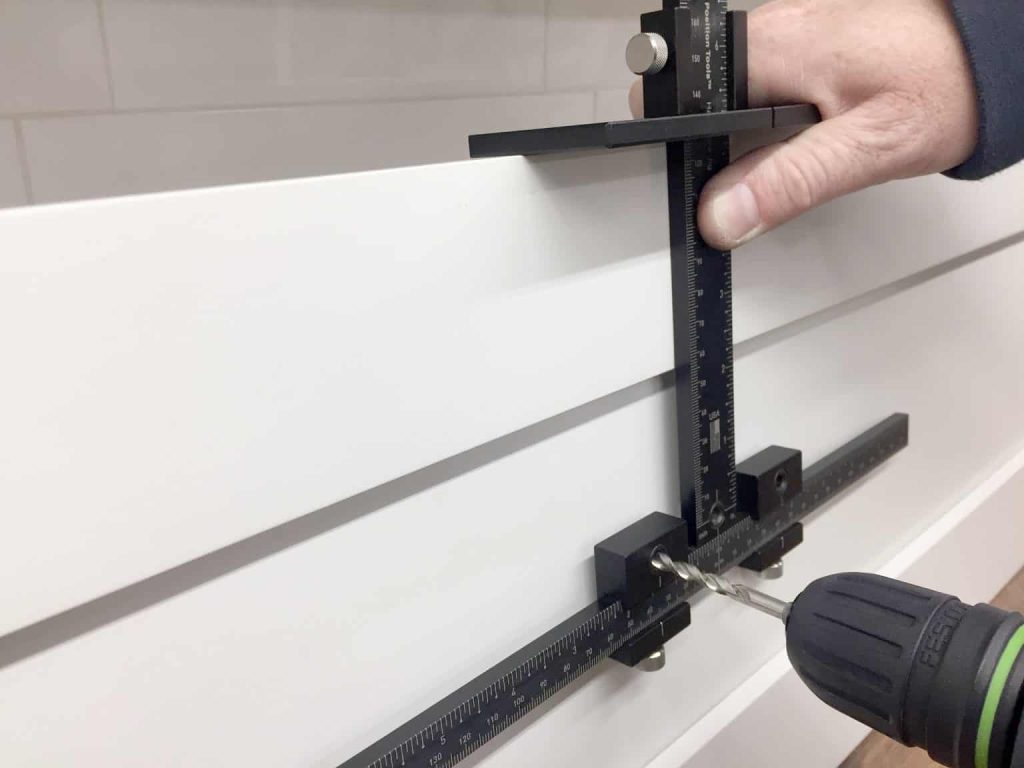
1. Centering the Hardware
- Measure the width of the drawer to find the center. For larger drawers, divide the width into thirds for multiple pulls.
- Mark the center with a pencil, ensuring the placement aligns with the recessed panel or top rail.
2. Using the Cabinet Hardware Jig
- Set up the Cabinet Hardware Jig by adjusting the Large Stop to match the drawer height.
- Align the jig with your marked center point, ensuring it rests firmly on the top edge of the drawer. This setup suspends the jig in the air, keeping it perfectly perpendicular to the drawer front.
3. Drilling the Holes
- Drill through the drawer front using the jig’s fixed center drill bushing. The bushings guide the drill bit, ensuring accurate and straight holes every time.
- If you’re installing pulls, measure the hole centers and adjust the jig’s Sliding Drill Guides accordingly. Cover any unused bushings with tape to avoid accidental drilling.
4. Final Installation
- Insert the screws from the inside of the drawer and attach the knob or pull handle to the front. Tighten securely without over-tightening to avoid damaging the wood.
Additional Tips for Large or Heavy Drawers
For large or heavy drawers, consider using two knobs or pulls. Divide the drawer into thirds and place the hardware in the center of each section. Alternatively, use an oversized pull that spans at least ⅓ to ⅔ of the drawer’s width.
Conclusion
Installing handles and knobs on Shaker drawer fronts doesn’t have to be intimidating. With the right tools and careful measurements, you can ensure that your hardware is perfectly aligned and adds to the beauty of your kitchen. At US Kitchen Cabinet, we provide the tools and expertise you need to make your kitchen remodel a success. For more tips and high-quality cabinetry, explore our hardware selection and get started on your project today.
John Miler
Latest Post

Standard Door Sizes

How to Choose the Best Plywood for Cabinets and Furniture
How High Should Upper Cabinets Be from Your Floor and Countertop
Peninsula Kitchen Layout

Island Kitchen Layout
